 A few weeks ago, my family attended the retirement ceremony of my brother, who is retiring as a Chief Master Sergeant after thirty-eight years of active and reserve service with the US Air Force. My twin and I were asked to provide floral arrangements for the luncheon event, so we wanted to design something unique and appropriate for the occasion.
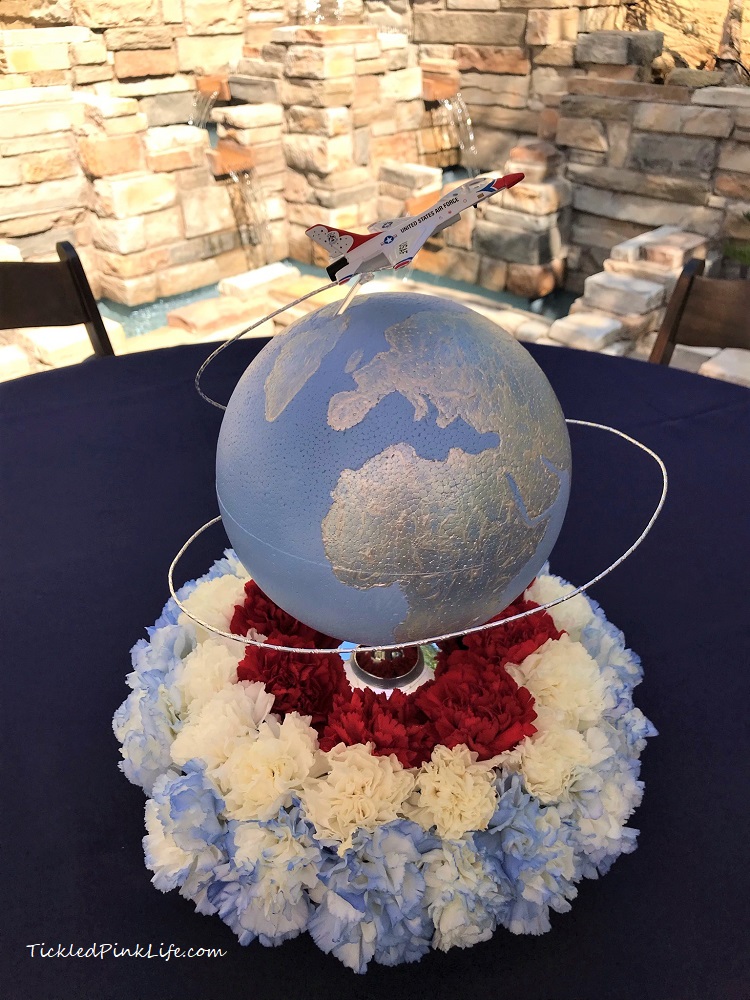
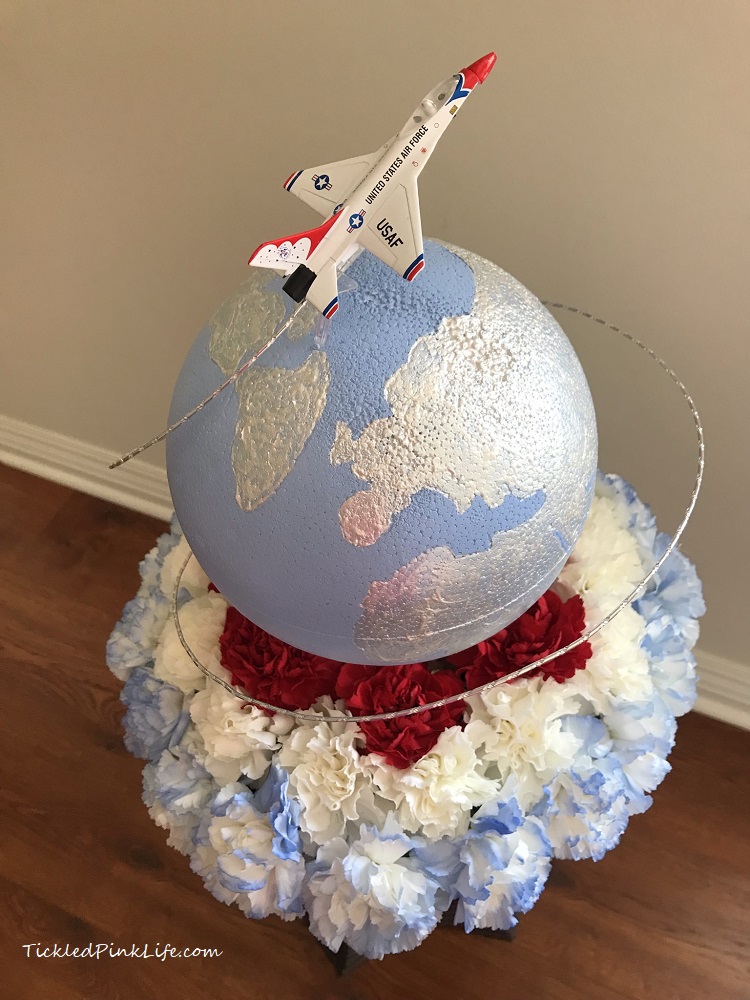
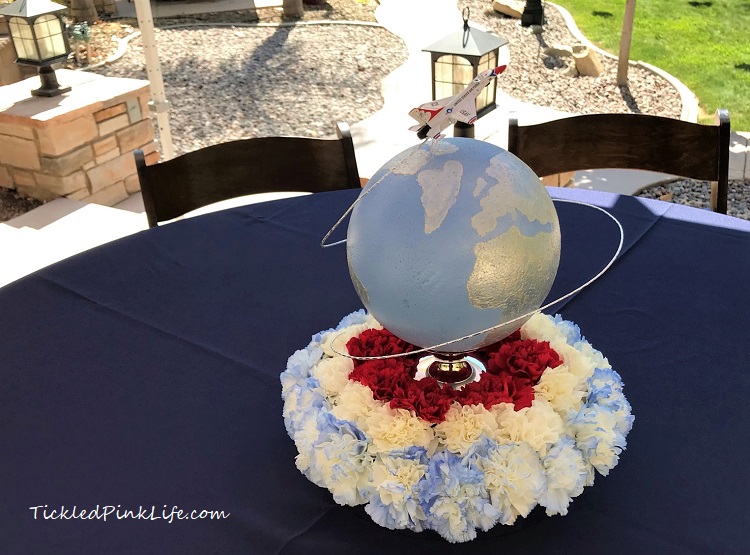
Being twins, we often think alike so it came as no surprise when we both came up with the same idea—which was to base the design on the centerpieces seen in The Glass Bottom Boat! The 1966 movie, with Doris Day and Rod Taylor featured some wonderfully patriotic globe-centric arrangements with rockets, as Taylor played an astronaut. We proposed using a similar design with an Air Force jet circling the world.
The project started with a plan for height and width, and a list of supplies. Here is what we purchased or assembled:
Vacuum Orna-metal silver metallic plastic tray, 11” diameter, 2” tall
Vacuum Orna-metal silver metallic plastic compote, 5” diameter, 5.5” tall
plastic anchor pins
cold glue (like Elmers)
hot glue
Polystyrene balls, 8” diameter, smooth and solid (not hollow)
Krylon Paint & Primer gloss spray paint, light blue, 2 6 oz. cans
World continents map printed at about 11” tall from top of Greenland to the tip of South America
Straight pins
Pencil
DecoArt pearlized textured paint, 8 oz.
Small paint brush
Decorative Diamond wire, 12 gauge, 32’ long
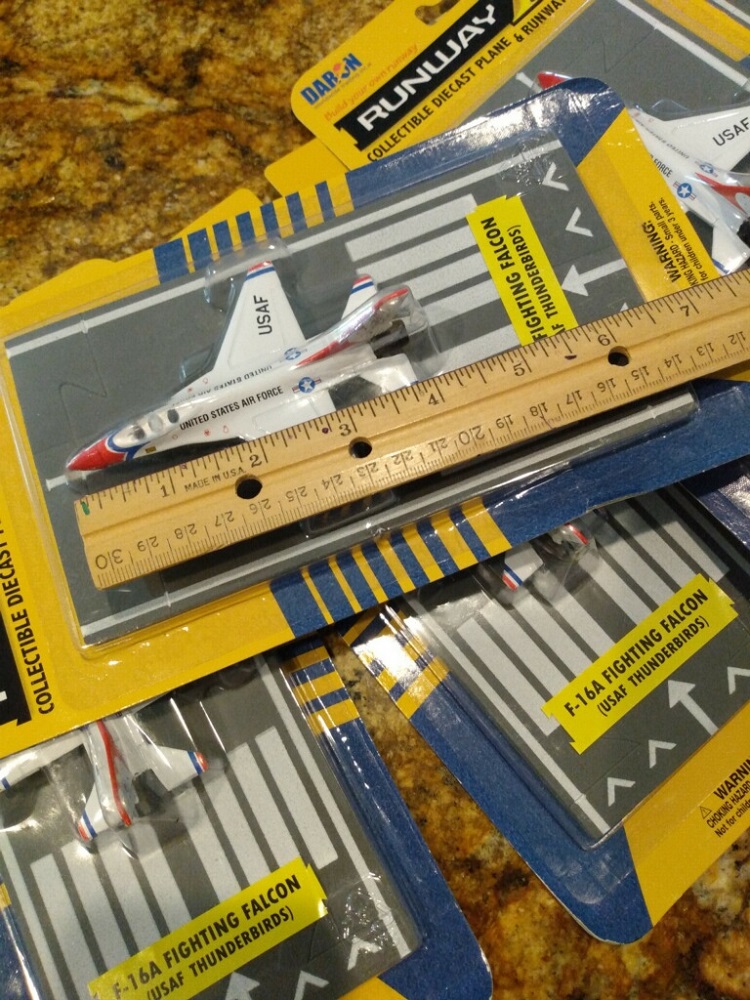
Daron Runway collectible diecast planes, 4” long
Angled card holders
Design Master flower dye spray, Delphinium Blue
Oasis floral foam standard bricks, 2 per arrangement
White carnations, 30 per arrangement
Red carnations, 7 per arrangement
Vendors for some of the items:
Vacuum Orna-metal by the piece: For non-trade buyers (no resale license): Wholesale Flowers and Supplies https://www.wholesaleflowersandsupplies.com/
Vacuum Orna-metal by the case and plastic anchor pins: For non-trade buyers: Marshall Floral Products https://www.marshallfloralproducts.com/
Floral supplies: For buyers with resale licenses: Floral Supply Syndicate https://www.fss.com/
Planes: Pilot Mall.com https://www.pilotmall.com/; Air Force Museum Store https://store.airforcemuseum.com/; Die Cast Airplane https://www.diecastairplane.com/
Decorative Diamond wire: Amazon
Polystyrene balls, spray paint, textured paint, brushes, angled card holders, flower spray, oasis: Several retail and online craft stores including Michaels, Hobby Lobby, Amazon, etc. You may also find some of these items through Ebay or Etsy vendors. One note about the polystyrene balls—these are very easily damaged, and flat spots or flaws cannot be concealed by paint. If you purchase these online, be sure to do so with plenty of lead time in case they need to be returned for replacements. It is better to pick these up in person where you can inspect them for damage before you buy them.
We started with the non-flower components of the design, completing them in three stages—preparing the worlds, preparing the containers, and preparing the planes.
Preparing the worlds
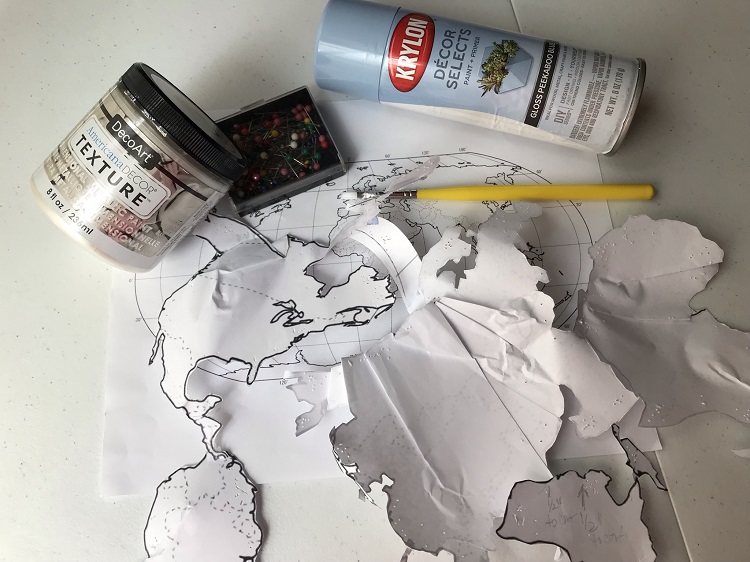
1) Painting polystyrene balls – I used a narrow plant stake/dowel to hold and twist the ball during painting to better control the amount of paint applied, making sure the paint layer was consistent over the entire ball. This works best if quick multiple passes are made, as I found that concentrating paint too heavily in one spot bubbles the polystyrene due to solvents in the paint.
2) Making the world pattern – I saved an online image of a world map, and then printed it at about 11” tall from the top of Greenland to the tip of South America. If I could have printed the entire map on one 11×14 page, that would have been preferable. Unfortunately, I didn’t have that capability so I had to print segments of the image on three pages (making sure they were all at the same height) and then lining up the continents and taping the pages together so that I had the entire image at 11” tall. Once the pages were taped on the front, I turned them over and taped all of the overlapping paper in the continent areas, because everything else was to be cut away. As I cut out the continents, I didn’t want a lot of loose islands that I’d have to figure out later where they go on the map, so I left narrow paper bridges between those islands and the larger land masses they were close to. For the larger non-contiguous mass of Australia, I penciled in directional arrows so I’d know where to place it later. Numerous small island areas were made into an extension of the continent for simplicity.
 3) Crafting a three-dimensional map – Once the continents were cut out, the map was essentially two large pieces, plus Australia. Using straight pins, I started by securing the top of North America to the polystyrene, and then following the curvature of the ball, I “cinched up” the paper so that the continents were not crooked on the world. As small folds were made, I taped them down and eventually the land mass developed a concave shape. The same process was used for the European/Asian land mass. When both large land masses were sufficiently rounded, taped, and pinned in the right places with respect to one another, I made a “paper bridge” that straddled the top of the world and was taped to the two large land masses. An “X” marked the center and this helped to make sure that the continent traces would be consistent on each world.
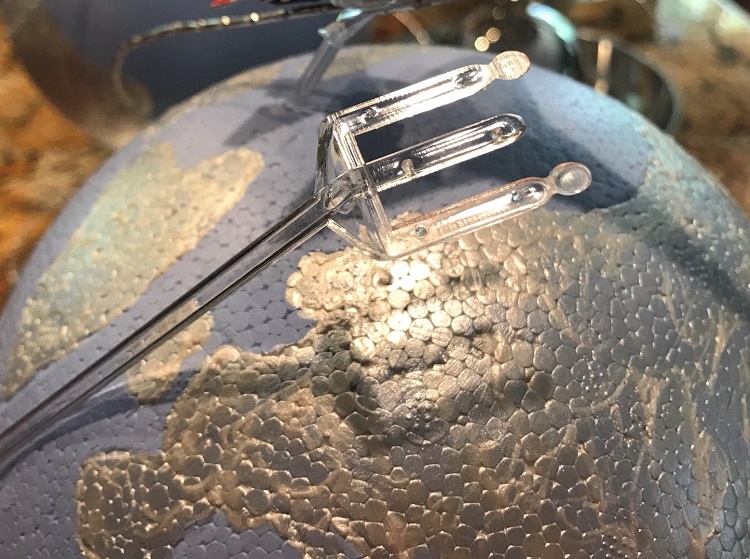
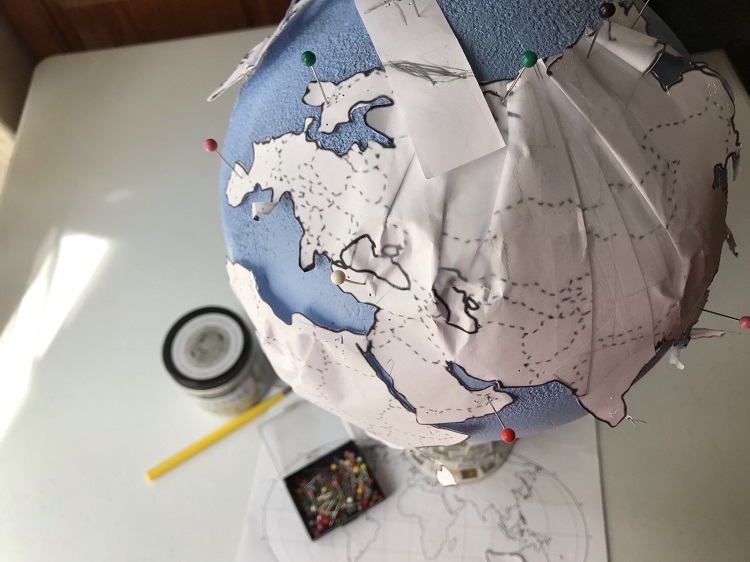 4) Tracing the continents – I used straight pins to secure the continent map to the polystyrene ball, making sure the center point at the top of the world was directly opposite of any dowel holes used during painting. A dull pencil was used to lightly drag around the continents, just enough to leave a light indentation. I found that trying to “draw” directly onto the polystyrene ball just left puncture holes in the world.
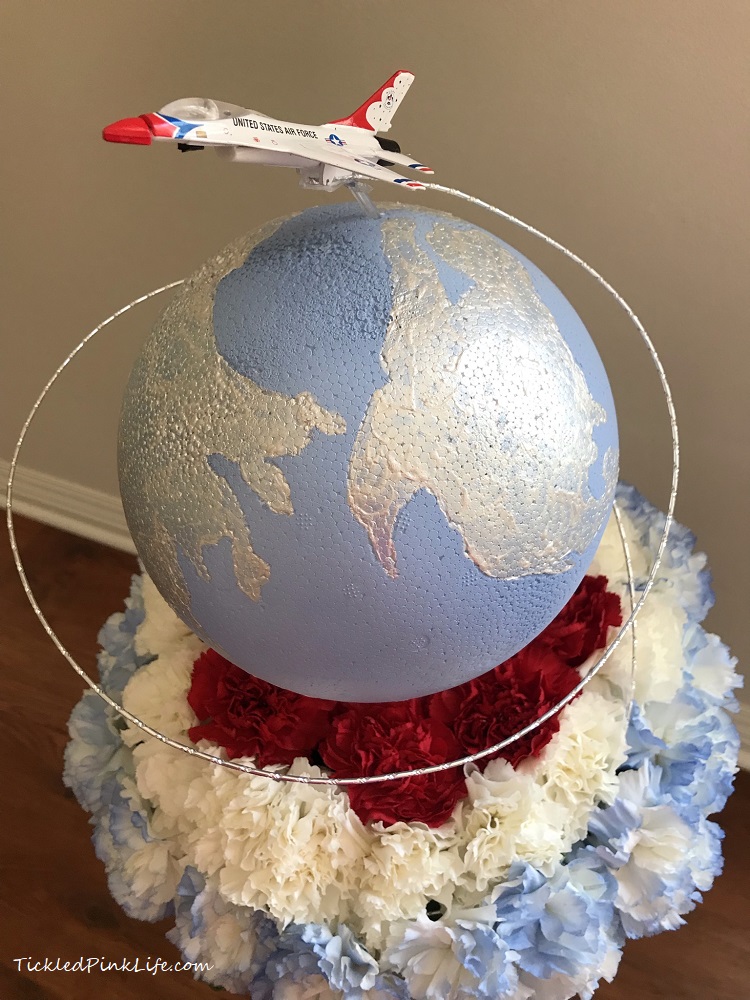
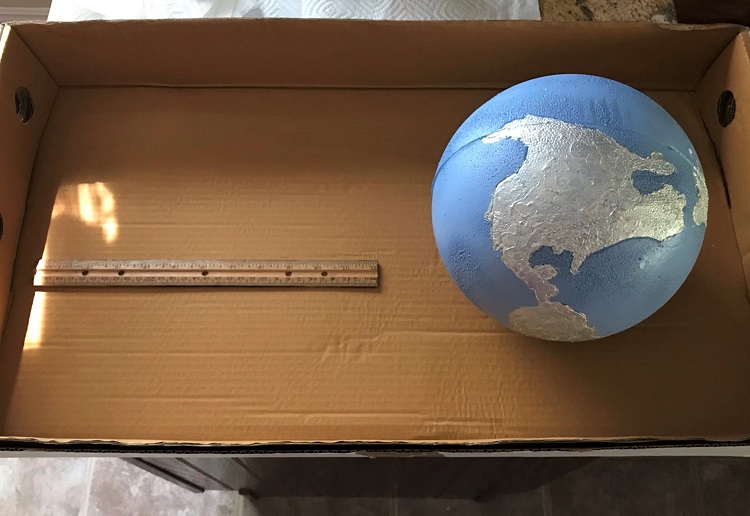 5) Painting the continents – I used a small brush and textured paint to first outline and then fill in the continents. Tracing over some of the “paper bridges” didn’t leave much of an indentation, but having a full copy of the map to reference during the painting process helped remind me of where some missing lines should be. This was also helpful where some indentation lines were hard to see. A wide mouth glass vase was useful to hold the ball during painting.
Preparing the containers
1) Assembling the main container – Using hot glue, the inverted (upside down) compote was secured to the center of the round tray. The bottom of the compote foot serves as a curved base to hold the globe.
2) Preparing the compote foot – There was a plastic piece in the foot of the compote that would have interfered with placement of the anchor pin, so we twisted off the compote foot, cut down the plastic piece (with scissors/wire cutters), and replaced the foot. Hot glue was used to secure a plastic anchor pin to the foot of the inverted compote.
Preparing the planes
1) Cutting card holders – We used an angled card holder for each plane, cutting off the two outer prongs so that just the center prong remained. The stem of the card holder was cut to about 5” long.
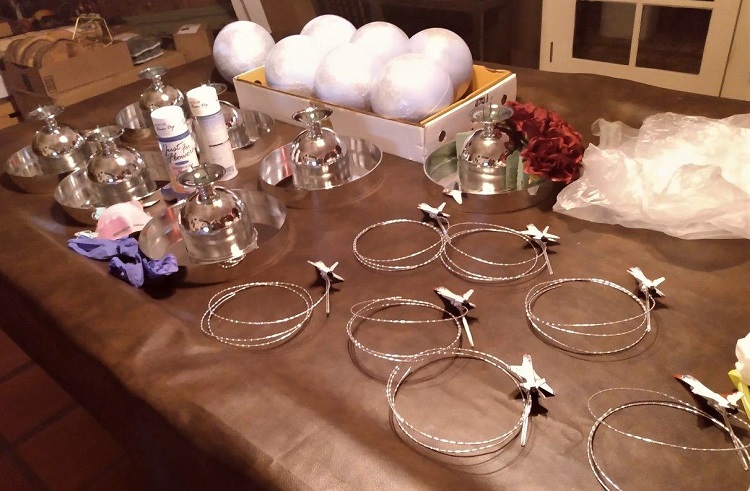
 2) Cutting diamond wire – The diamond wire was cut into 4-foot lengths, and each piece was tightly wrapped around a kitchen cannister about 6” in diameter.
3) Gluing diamond wire – We used hot glue to attach one end of the coiled diamond wire to the center prong of the card holder, making sure the end was angled upward and the coil continued from the downward side.
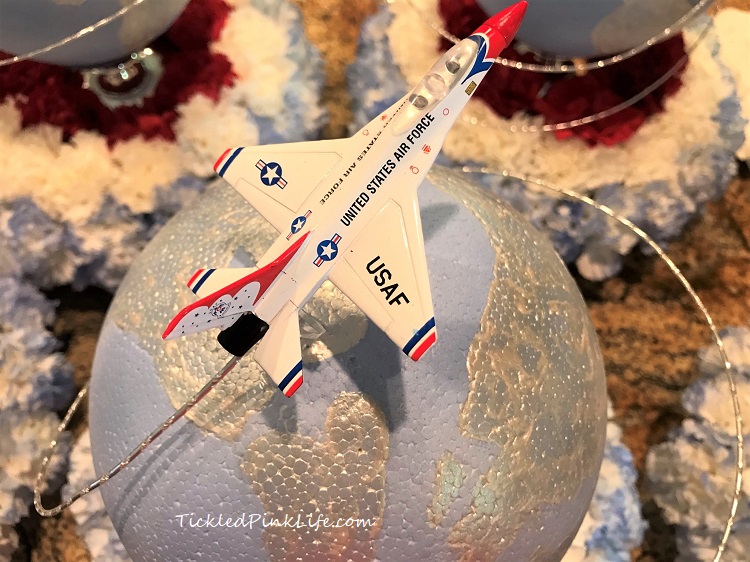
 4) Gluing planes – The plane wheels were removed and hot glue was used to attach the plane to the card holder. With the wheels removed the center prong of the card holder fit nicely between the two wheel-wells. The plane was positioned with the front on the upward angle so that the coiled wire extended out from beneath the back of the plane as a contrail.
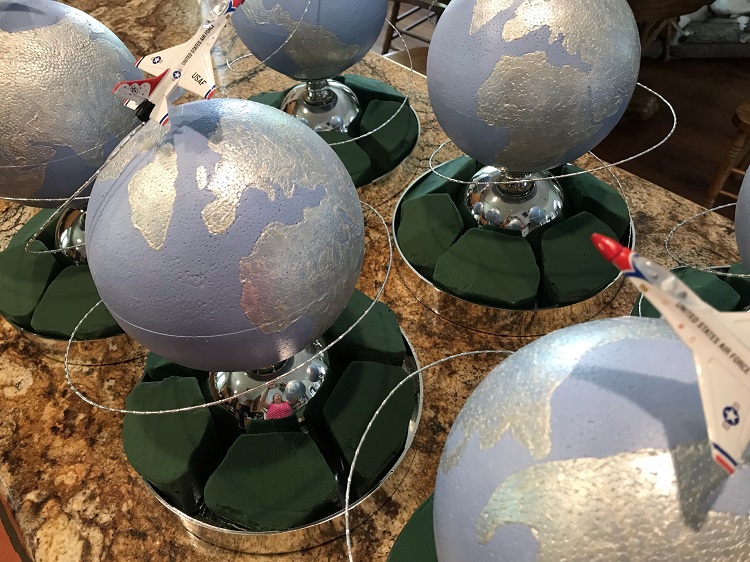
Assembling the non-flower components
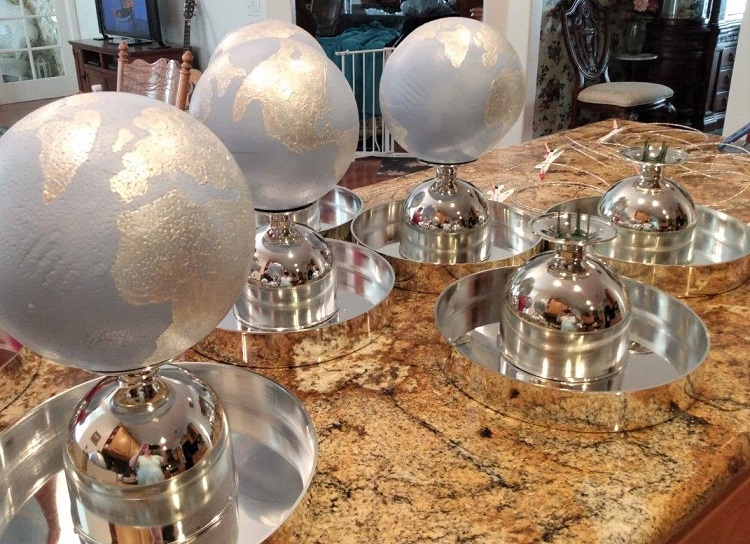
1) Attaching the worlds – We used an Elmers-type cold glue around the rim of the compote foot. Finding the bottom of the globe, we carefully placed it onto the anchor pin, pressing gently until it was firmly seated, and holding it in place until the glue set up a bit.
 2) Attaching the planes – Determining where along the top of the globe we wanted the plane to be flying, we estimated where we’d need to insert the card holder at an angle so that the plane would end up in the right spot. Since the card holder end was blunt, not sharp, a small hole was started with an ice pick, to avoid accidentally making a bigger hole than we intended. Using the starter hole, we gently inserted the card holder stem in a diagonal/angled fashion until the tail of the plane was about 1-2” above the earth. We didn’t use glue at this stage as our planes all seemed very secure, but if it had been needed, we would have used a bit of Elmers-type cold glue (which dries clear) around the hole.
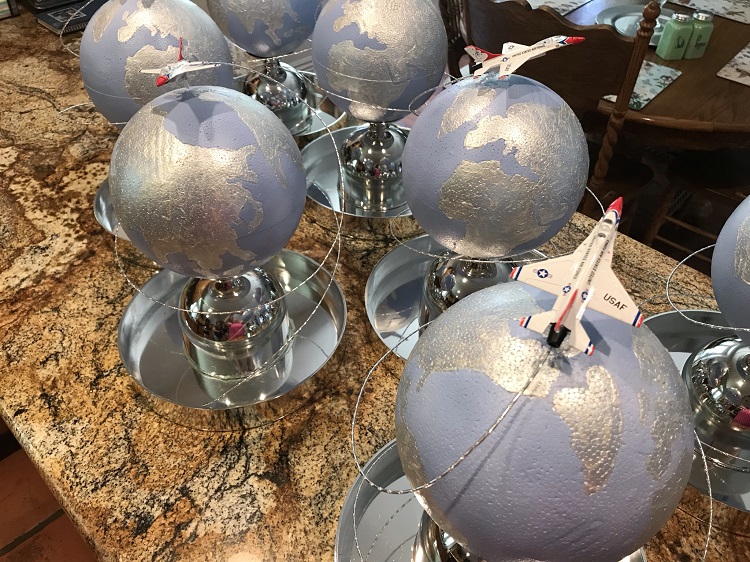 3) Arranging the coiled wire – Once the plane was secure, we gently pulled the coiled wire down around the world so that it formed a circular shape of about 2 rotations, ending inside the circular tray.
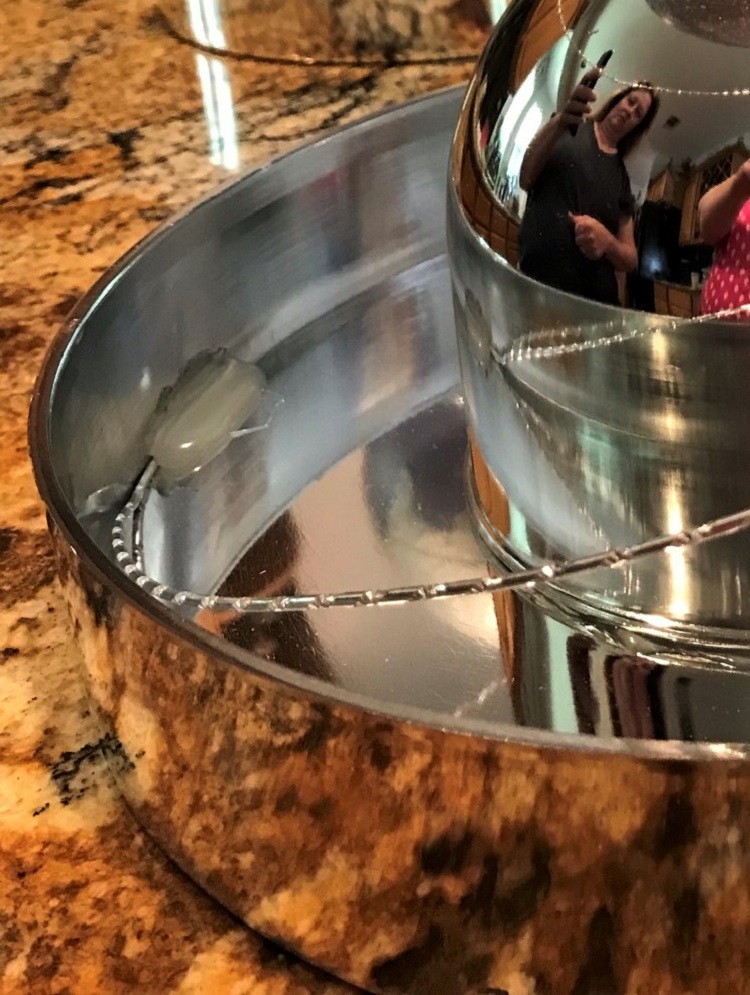 4) Securing the wire end – We bent the last 1” of the wire so that it could sit flush with the inside edge of the tray. One of us held the wire in place just above the final inch, and the other used hot glue to secure the wire to the inside of the tray.
Preparing and installing the flowers
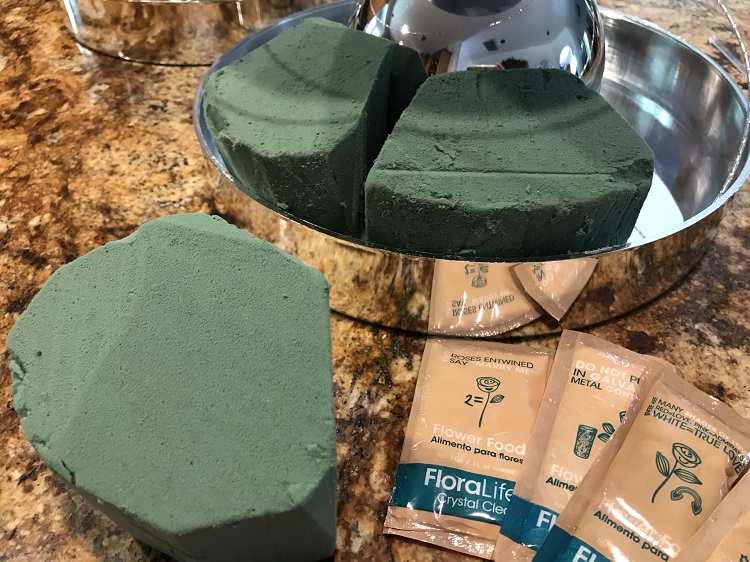 1) Cutting oasis – Using two standard oasis bricks per arrangement, we pre-cut the dry bricks into thirds. Then we cut the top of each piece at an angle so that the lower side was about 2” tall (front) and the higher side was about 3” tall (back). Slight cuts were also made to the corners so that the six pieces would fit around the base of the dish.
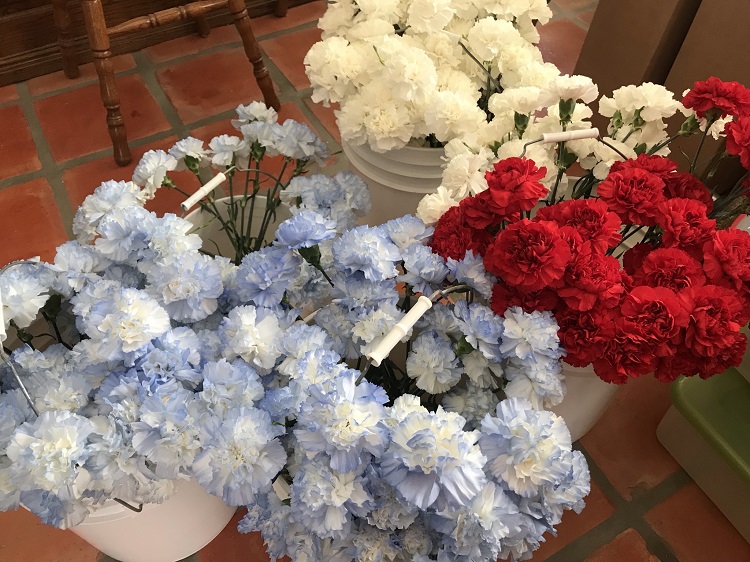 2) Hydrating flowers – We purchased carnations from the flower market, buying at least 40 white and 8 red for each centerpiece. Fresh flower preparation always starts with hydration. We used clean five-gallon buckets with about 5” of cool water and flower food (amount according to package instructions). The carnation stems were cut about 1” and placed into the water for several hours to properly hydrate.
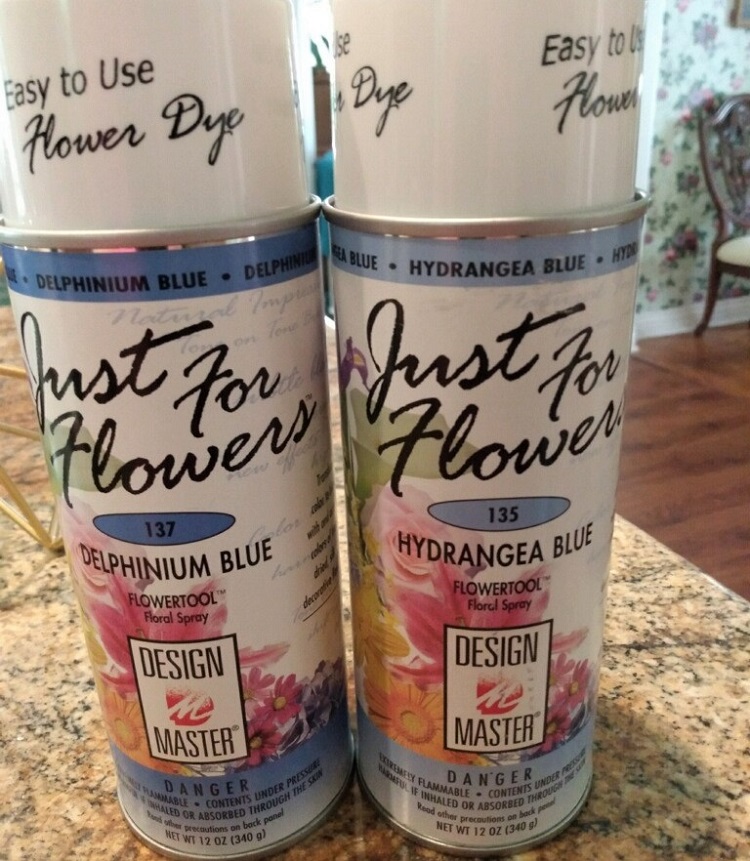 3) Preparing blue carnations – Since carnations don’t grow blue, they have to be colored. We used a floral dye spray designed for that purpose, to color 18 white carnations per arrangement. These were lightly sprayed in fast passes so as to evenly distribute the color. I believe they took about two coats to achieve the color we wanted.
 4) Soaking the oasis – The oasis pieces were soaked in a clean kitchen sink, about 12 at a time. Once fully saturated, 6 pieces were placed into each round container, with the short side at the front rim and the taller edge against the inverted goblet.
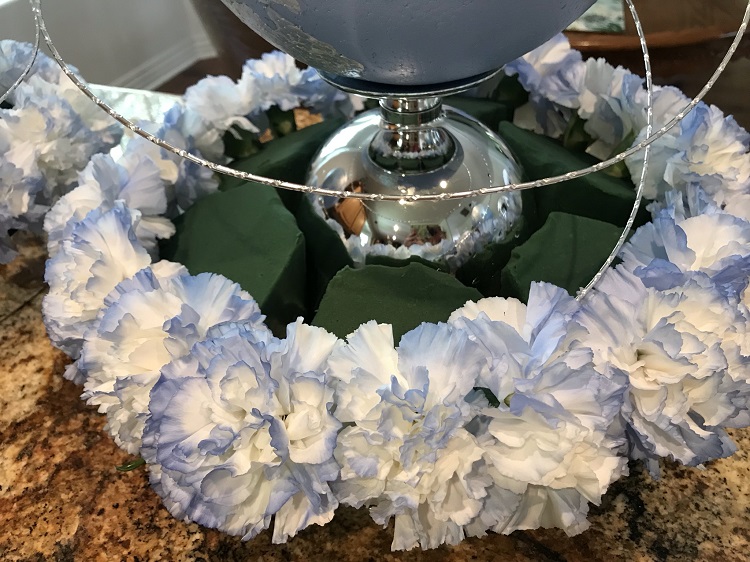 5) Placing flowers – Each centerpiece had 18 blue carnations, 12 white, and 7 red. Starting with the blue carnations, we placed three in each piece of oasis, right at the container rim. The one in the center was pointed straight out, while the two on either edge where angled away from the center.
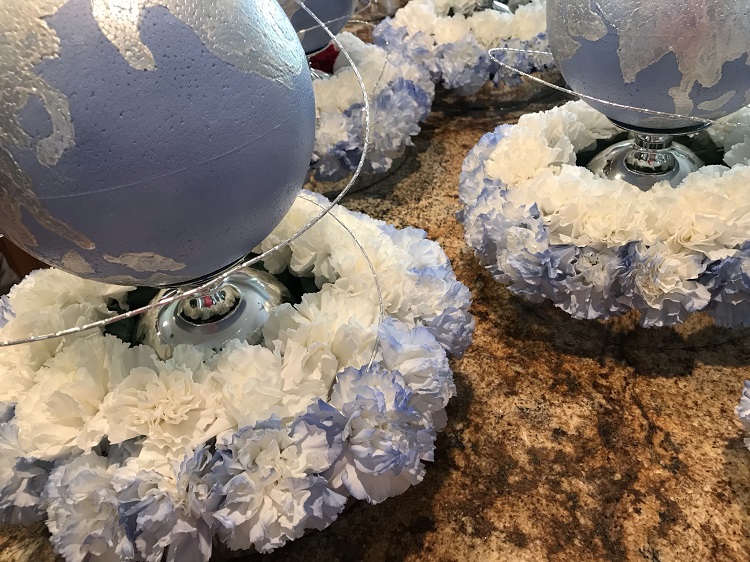 Next, two white carnations were placed in each piece of oasis, roughly in the space between the blue carnations, but on a row above them. The white carnations were angled at approximately 45 degrees.
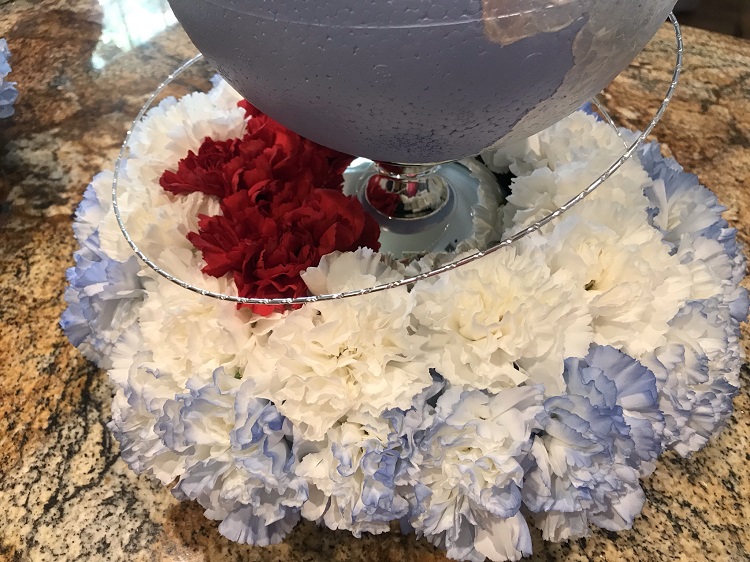 Lastly, the red carnations were placed in a row above the white, and angled upward. Roughly there was one red carnation per piece of oasis, and then we added another to fill in where it looked like there was a space gap. Having a few extra red ones is advisable in case you need to fill in. And with the last red carnation in place, the centerpieces were finished!
 On a logistical note, I wanted to point out that we were able to get 7 centerpieces into the trunk of my sisters Honda Accord with no problem.
![]() Our brother was very pleased with the centerpieces, saying that we went way over and above what he had expected! We were also happy with the finished pieces and thought that the jet contrail/flight path gave the arrangements a real sense of motion.
Our brother was very pleased with the centerpieces, saying that we went way over and above what he had expected! We were also happy with the finished pieces and thought that the jet contrail/flight path gave the arrangements a real sense of motion.
This design can be applied to any military or patriotic event. The types of planes we used are also available in other models and branches of the service. The design requires a bit of work, but the payoff is a very unique and memorable centerpiece that your guests will love!
On the journey toward Home,
Lynn


{ 1 comment… read it below or add one }
These are so amazing! Really love the use of colors — and see how the topper can be changed up to match any theme needed for a party. Such a crafty way to apply the world map to the styrofoam ball, too! Big congratulations to your twin brother.